Easter nailart easy to do

Easter nail art

Let's get into the spirit of Easter with these easy to do Easter nail art designs. There's a bunny, a chick and an egg design using only a couple of colors each and so simple anyone can do it. For a really festive vibe they look great on your toe nails too.
You will need
- clear base coat nail polish and a clear top coat polish. For economy buy the multifunction base and top coat polishes.
- coloured nail polishes of your choice
- coloured acrylic paints - any cheap set from the craft or $2 store will do. They just have to be acrylic.
- toothpicks and or dotting tool
- a really fine painting/striping brush(and a dish of water for cleaning your painting brush in).
Note :
- Make sure you let each layer of paint or polish dry thoroughly or you will end up with no picture, just a big, smeary mess!
- Use a basecoat as this helps your nailart adhere to the nail and not peel off immediately.
- Use 1 or 2 layers of clear topcoat over each nail as this helps seal in your design and helps to prevent the design wearing away quickly when you use your hands.
Easter Bunny / Easter Rabbit.
Easter Bunny / Easter Rabbit nail art
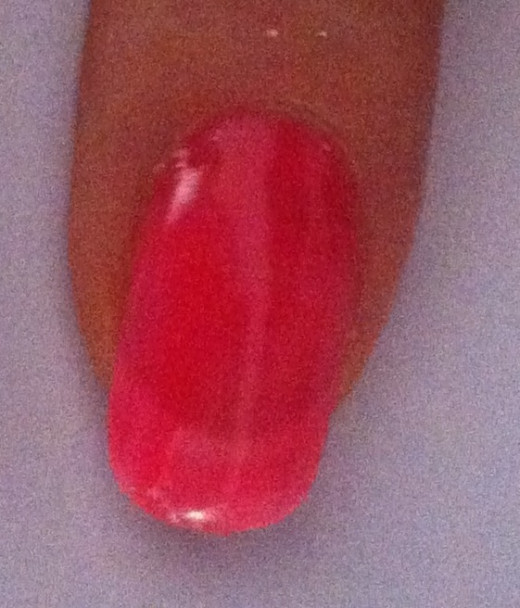
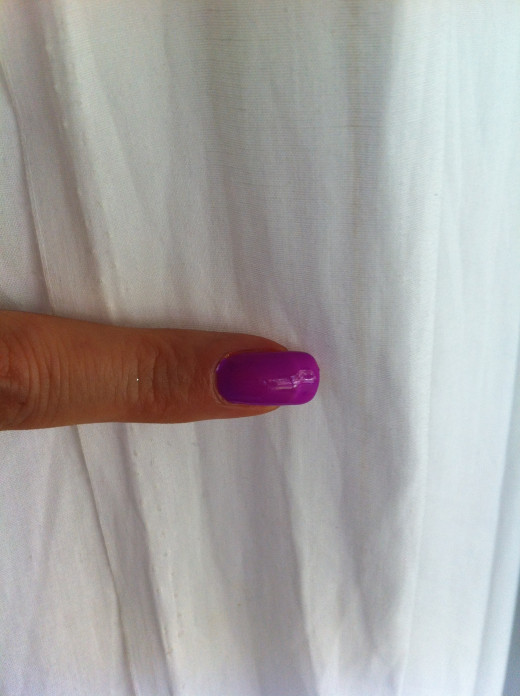
- First, apply your clear base coat over the entire nail and let it dry well.
- Apply a thin layer of your chosen background polish colour. Here I have chosen a bright coral colour. Let it dry well.
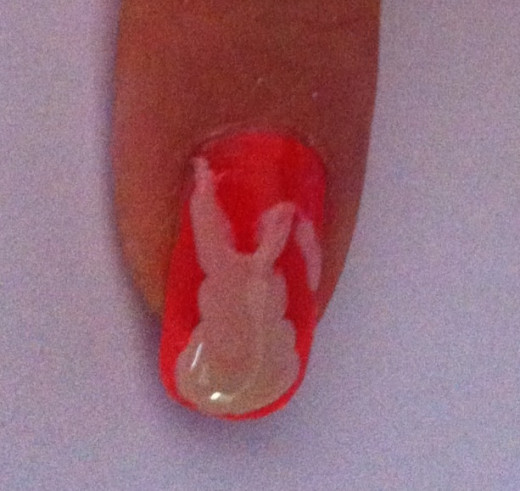
- Now we will paint in our rabbit. Choose a colour polish that will show up on your background. Here I have used a beige colour. Your can also use acrylic paint instead of polish.
- With your rabbit polish colour drop two dots of polish on the nail. One for the head of the rabbit and one for the body. I f you are using acrylic paint for this paint in to circle with your fine paint brush.
- Don't worry if the circles aren't perfect. I have purposely made my bottom circle bulge out to be to give the shape of the rabbits legs and backside.
- For the rabbits ears, using your polish brush or paint brush, draw a line straight up and one like an upside down tick. This will look like a flopped over ear. Again, let this dry thoroughly.
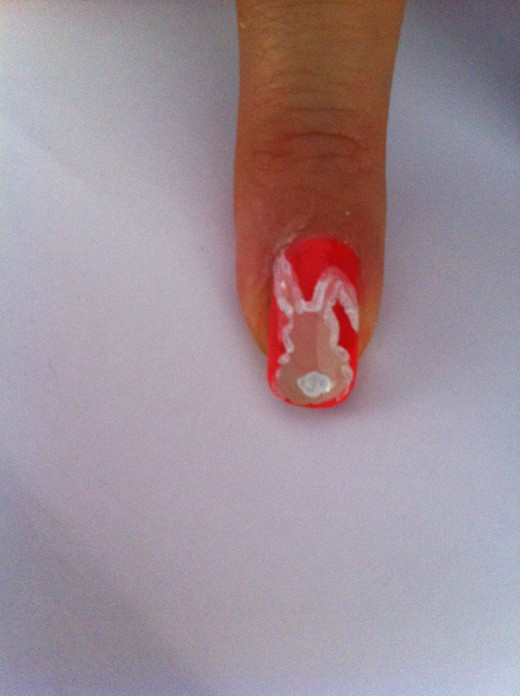
- Next get your little paintbrush and some white acrylic paint and use it to outline the rabbit.
- Form a little cloud shape on the bottom of the rabbit for his tail.
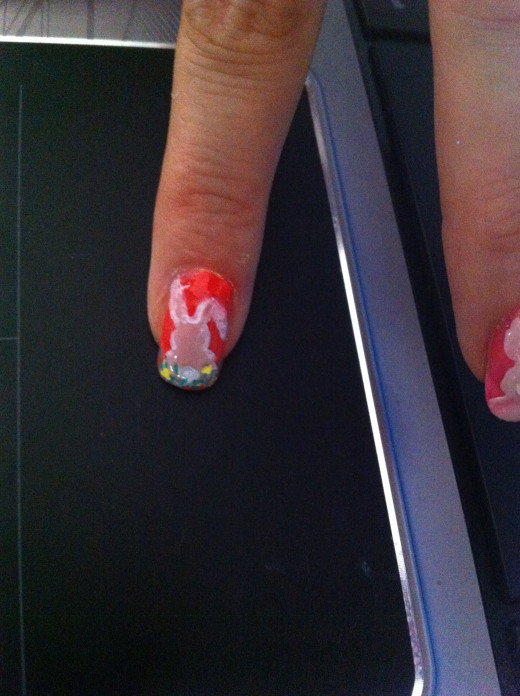
- With your brush and acrylic paint, paint in some fine green lines around the rabbit for grass and a couple of yellow or other colour dots for little flowers. Let all the paint dry thoroughly.
- Finish off with a clear topcoat and let it dry.
There you have it. A very simple, cute Easter bunny nail even the kids can do.
Easter Chick

Easter Chick
- Polish your nail with a clear base coat layer.
- Apply a background colour of your choice over the entire nail. Keep the nail polish layers thin to allow them to dry quickly.
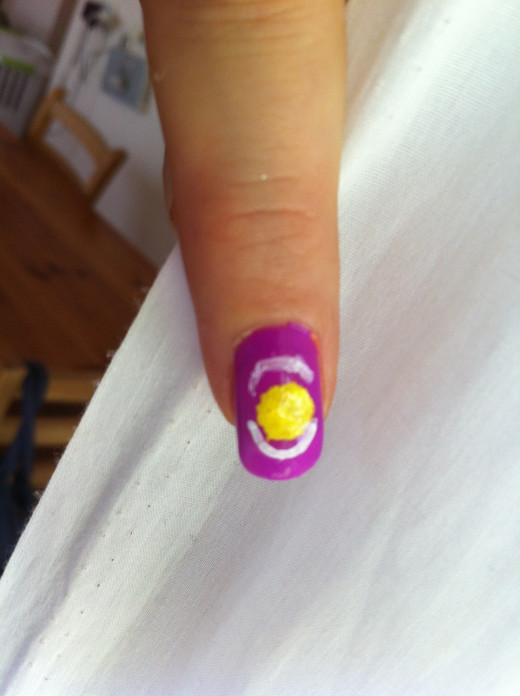
- With your polish brush or paint brush, apply a yellow dot of acrylic paint or nail polish in the center of the nail and spread the edges out a little bit so that the circle edge is not perfect.
- Create two white 'C' shapes just above and below the yellow dot.
- Add a zigzag shape to each of these whites 'C ' shapes as shown. Try and keep the zigzags sharp so that they have pointed edges
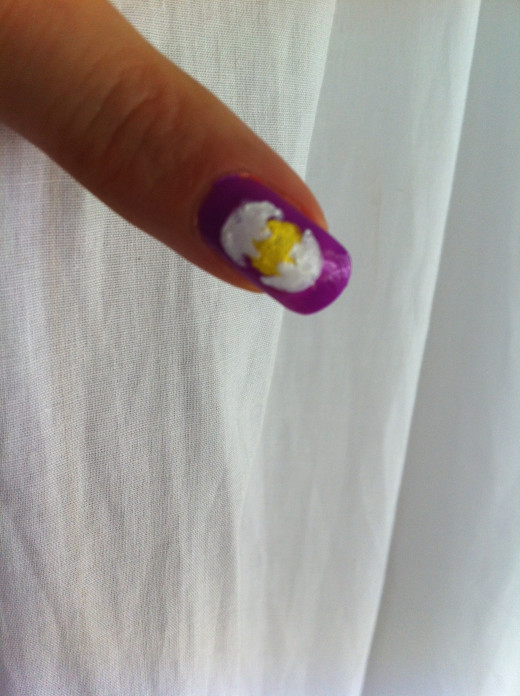
- Now fill the 'C' shapes in. This has formed the cracked egg shell.
- Next use your toothpick to paint to little black dots with acrylic paint or nail polish to create the eyes of the chick.
- With the other end of your toothpick dot in a tiny upside down triangle shape.
- Let all the paint and polish dry thoroughly.
- Finish off with a clear topcoat to protect your picture.
Easter Egg with bow.

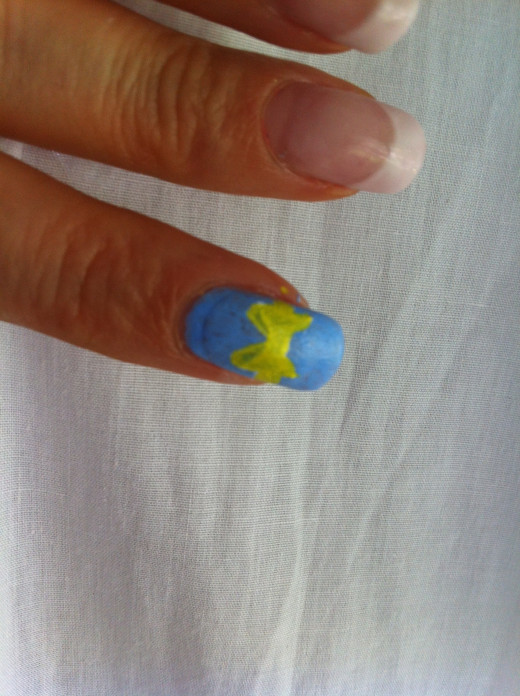
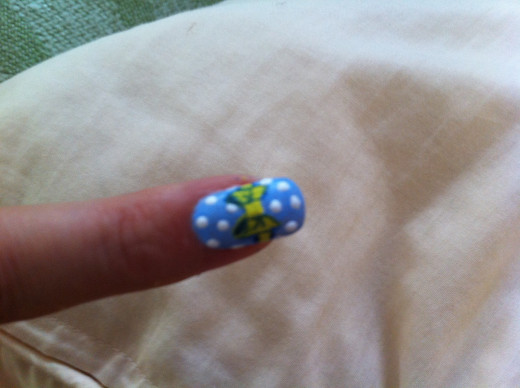
Easter Egg with bow.
- Using a clear base coat polish over your whole nail and let it dry.
- Next apply your choice of background colour using either acrylic paint or nail polish and let this dry thoroughly too.
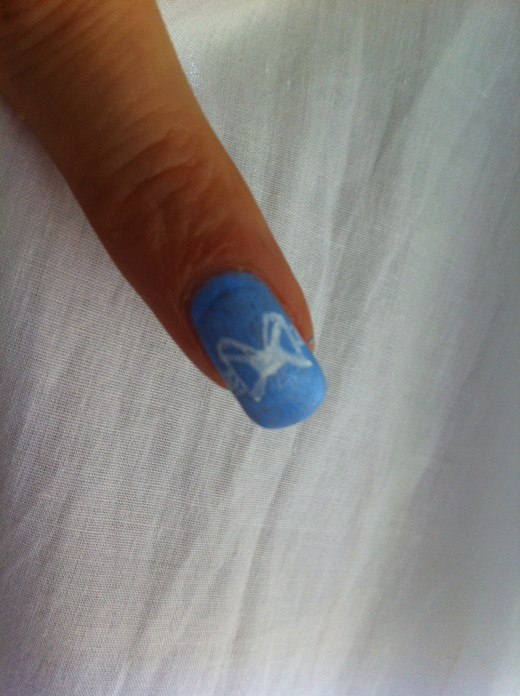
- With your fine paintbrush or toothpick draw the outline of a bow.
- To do this draw a square in the middle. Next draw two triangles one either side of the square. This will form the bow. At the top of the triangles drawn upside down teardrop to give the Bow a little bit of shape. Then on either side draw in a couple of parallel lines all the way to the edge of the nail to form the band of the bow.
- Use a different polish or paint colour that is bright and paint over the bow as shown in the picture. I have used yellow acrylic paint here.
- Let this dry thoroughly.
- While the bow is drying use your toothpick (will create very small dots, dotting tool or the end of your paintbrush to dab on spots all over your nail. You can really use any colour that you think compliments the other colours you have already used on your nail. Here I have used white acrylic paint for my dots.
- Your bow should be dry by now so using your fine paint brush, paint in the outline of the bow to. I have used dark blue which has changed into a green blue because it is over the yellow paint. Let's this dry thoroughly.
- Finish off with a clear top coat.
Another easy Easter nail art design to do at home.
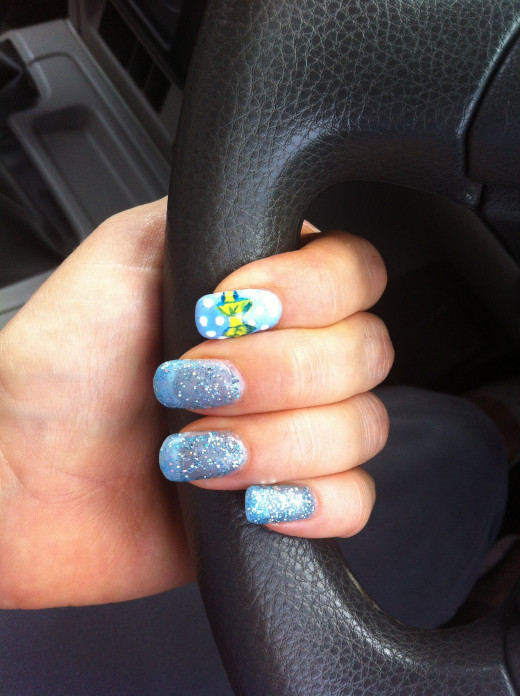
Nail art is so fun and creative. Remember this is just a basic tutorial to get you started but you can add in gems,striping tape patterns, glitter etc. Let your imagination play. The great thing about nail art is it doesn't matter if you make a mess, you can just wipe off and start again. If you love nail art check out my other hub for more nail art ideas here. They are all easy and fun to do.
Check out my other Easter hubs
Easter craft Easter bunny How to make a cute and easy Rabbit.
Easter crafts -how to make mini Easter baskets and Easter nests.
Check out my other hubs on beauty, nails care, nail art and skin care
Waxing - how to wax your arm hair free like a pro.
Manicure how to DIY for the Man.
Nails are nice with nail art - How to - nice and easy!
Pedicure how to - easy to follow steps as good as any salon.
If you enjoyed my hub please check out my other hubs, comment, share and email the link to friends and checkout the items printed in blue for my recommendations and links

© 2013 Frangipanni


